 Visual Paradigm Desktop |
  Visual Paradigm Online


Creating clear system specifications is a critical part of building software within an Agile environment. While Scrum emphasizes flexibility and iterative development, having a solid understanding of system behavior remains vital. Use Case Diagrams serve as a bridge between stakeholder requirements and technical implementation. They visualize how users interact with the system without getting bogged down in code.
In the context of Scrum, these diagrams help product owners and developers align on what the system must do before writing a single line of code. This guide provides a structured approach to creating these diagrams effectively, ensuring clarity and accuracy throughout the sprint cycle.
A Use Case Diagram is a behavioral diagram that describes the functional requirements of a system. It focuses on the what rather than the how. In Scrum, this translates to understanding the value delivered to the user rather than the technical architecture.
These diagrams consist of three main components:
Unlike rigid waterfall models, Scrum allows these diagrams to evolve. They are living documents that adapt as the backlog is refined. This adaptability is key to managing scope creep while maintaining a clear vision.
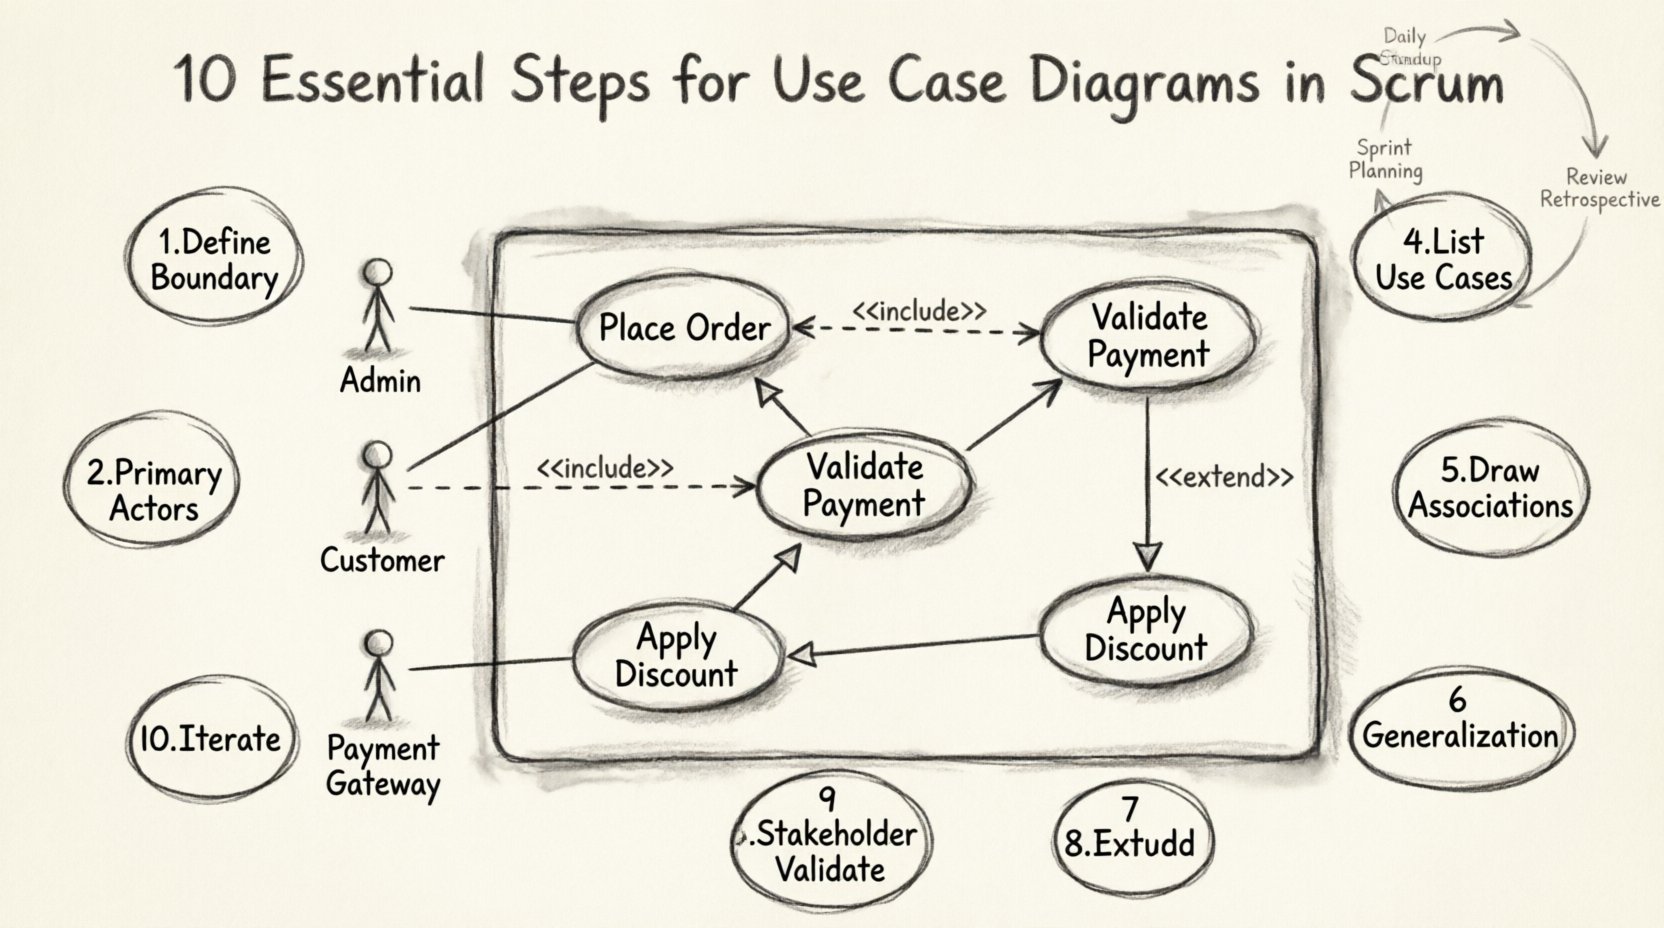
To ensure your diagrams serve their purpose, follow this comprehensive checklist. Each step builds upon the previous one to create a cohesive picture of the system.
The first step is establishing what is inside the system and what is outside. Draw a box that represents the scope of the software being developed.
Clear boundaries prevent scope ambiguity. If a feature is on the edge, decide if it belongs inside the box or remains an external actor interaction.
Primary actors are the main users who initiate interactions to achieve a goal. In Scrum, these are often represented by personas derived from user stories.
Label each actor clearly. Avoid generic terms like “User” if specific roles exist, such as “Admin” or “Customer”. Specificity aids in understanding permission levels later.
Secondary actors are systems or users that the primary actor interacts with indirectly. These are often automated services or external databases.
Documenting these ensures the team accounts for dependencies. If an external API changes, the impact on the use case is immediately visible.
For each actor, list the goals they want to achieve. Each goal becomes a use case. In Scrum, these often map to acceptance criteria or specific user story outcomes.
This step helps in estimating effort. Large use cases can be broken down into smaller user stories during backlog refinement.
Connect actors to use cases using solid lines. This represents a direct association.
Clarity here is paramount. A messy web of lines obscures the actual flow of work.
Generalization allows you to group similar use cases or actors. It reduces redundancy and improves readability.
This helps in managing complex systems without cluttering the diagram with every minor variation.
An include relationship indicates that a use case must call another use case to complete its function. It is a mandatory dependency.
This clarifies mandatory steps. It ensures the team knows that certain sub-processes are non-negotiable parts of the main flow.
An extend relationship indicates an optional behavior that can occur under specific conditions. It is a conditional dependency.
Distinguishing between include and extend is crucial for development logic. Include is mandatory; extend is optional based on state.
Before finalizing the diagram, review it with the Product Owner and key stakeholders. In Scrum, the Product Owner represents the voice of the customer.
Feedback loops are essential. A diagram that looks perfect on paper might miss a real-world constraint. Stakeholder validation catches these early.
Use Case Diagrams are not static. As the product evolves, the diagram must evolve. During backlog refinement sessions, update the diagram to reflect new stories or removed features.
This keeps the documentation in sync with the codebase. It prevents the diagram from becoming a relic that no one reads.
Confusion often arises between Use Case Diagrams and User Stories in Scrum. While related, they serve different purposes.
| Feature | Use Case Diagram | User Story |
|---|---|---|
| Scope | System-wide behavior | Specific iteration goal |
| Focus | What the system does | Who wants what and why |
| Duration | Long-term reference | Sprint-specific |
| Format | Visual Model | Text Template |
| Detail Level | High-level flow | Acceptance Criteria |
Use Case Diagrams provide the map; User Stories provide the step-by-step journey. Both are needed for a complete picture.
Even experienced teams make mistakes when modeling systems. Be aware of these common issues to maintain diagram integrity.
While the method matters more than the tool, selecting the right software can streamline the process. Look for tools that support drag-and-drop functionality and export capabilities.
Ensure the tool supports standard notation (like UML) so other developers can read the diagram without special training.
How do you know the diagram is accurate? Look for these indicators of success.
If the team spends more time debating the diagram than the code, it may be too complex. Simplicity is a virtue in documentation.
Use Case Diagrams fit naturally into specific Scrum events.
Review the diagram to ensure the selected stories align with the system capabilities. Identify any gaps in the flow before committing to the sprint.
Use the diagram to discuss blockers. If an actor cannot reach a use case, identify the missing dependency.
Demonstrate the functionality against the diagram. If the system works but the diagram doesn’t, update the diagram.
Discuss if the diagram helped or hindered development. Was it too vague? Too detailed? Adjust the level of abstraction for the next sprint.
Building accurate Use Case Diagrams in Scrum requires discipline and collaboration. It is not about creating a perfect drawing; it is about creating a shared understanding.
By following these ten steps, teams can ensure their requirements are clear, their boundaries are defined, and their development efforts are focused on delivering value. The diagram becomes a tool for communication, not just a technical artifact.
Remember that the goal is not perfection on the first try. It is progress. Start with a simple box, add an actor, and build from there. The complexity will grow as the product grows.
Keep the team involved. Keep the stakeholders engaged. And keep the diagram updated. This iterative approach mirrors the Agile philosophy itself.
Use this checklist at the end of every modeling session. It ensures nothing is overlooked before the development begins.